
Valheim is an enjoyable (and rather addictive) game about Vikings, building things, and killing bosses. Playing it alone is perfectly fine, but it's best with friends. The most reliable way to do this is to host your own server — and using your own hardware is the cheapest and most controllable option. I've found that in both performance-per-watt and price-per-performance, the M1 Mac mini makes for a surprisingly capable server. Trying to get it running on Apple Silicon did take a bit of research, since as of writing Valheim only natively supports x86 processors. Fortunately, Apple Silicon handles x86 emulation well enough that you can host a server without trouble even on the base 8GB M1 Mac mini. Here's how to do it.
Table of Contents
- Necessary software
- Configure your Valheim VM and container environment
- Deploy your Valheim server container
- Access your server from the Internet
- Conclusion
- Troubleshooting
Necessary software
- Homebrew
- lima-vm/lima (
brew install lima) - socket_vmnet (
brew install socket_vmnetafter installing lima) - lloesche/valheim-server
Configure your Valheim VM and container environment
Before starting your VM instance, you'll need to configure your VM and container manifests. First, create a project folder:
mkdir -p $HOME/valheim-configs
cd $HOME/valheim-configs
Set up Lima VM
Lima VM is the best option I've found for proper QEMU emulation, which fully emulates x86 architecture rather than the partial emulation you might get from Docker Desktop or Parallels. Lima is also considerably more lightweight than fuller VMs like UTM or VirtualBox.
To install Lima, you'll need Homebrew first. Follow the instructions on the Homebrew site to install brew, then run brew install lima. Once that's done, install socket_vmnet — which handles port forwarding from the VM through to the host — by running brew install socket_vmnet. You're then ready to configure the VM manifest.
Lima config
Create the following .yaml manifest, titled valheim-server.yaml:
# full QEMU emulation
arch: 'x86_64'
# must be minimum 50GB
disk: 50GiB
# amount needed depends on player count
# generally half of what Intel needs
# recommend at least 4GiB
memory: 6GiB
# recommend at least 3 cpus
cpus: 4

# bridged creates separate IP on your LAN with the hostname "lima-<vm-name>"
networks:
- lima: bridged

images:
- location: "https://cloud-images.ubuntu.com/releases/22.04/release-20221201/ubuntu-22.04-server-cloudimg-amd64.img"
  arch: "x86_64"
  digest: "sha256:8a814737df484d9e2f4cb2c04c91629aea2fced6799fc36f77376f0da91dba65"
- location: "https://cloud-images.ubuntu.com/releases/22.04/release-20221201/ubuntu-22.04-server-cloudimg-arm64.img"
  arch: "aarch64"
  digest: "sha256:8a0477adcbdadefd58ae5c0625b53bbe618aedfe69983b824da8d02be0a8c961"
- location: "https://cloud-images.ubuntu.com/releases/22.04/release/ubuntu-22.04-server-cloudimg-amd64.img"
  arch: "x86_64"
- location: "https://cloud-images.ubuntu.com/releases/22.04/release/ubuntu-22.04-server-cloudimg-arm64.img"
  arch: "aarch64"

mounts:
- location: "~"
- location: "/tmp/lima"
  writable: true
containerd:
  system: false
  user: false
provision:
- mode: system
  script: |
    #!/bin/sh
    sed -i 's/host.lima.internal.*/host.lima.internal host.docker.internal/' /etc/hosts
- mode: system
  script: |
    #!/bin/bash
    set -eux -o pipefail
    command -v docker >/dev/null 2>&1 && exit 0
    export DEBIAN_FRONTEND=noninteractive
    curl -fsSL https://get.docker.com | sh
    systemctl disable --now docker
    apt-get install -y uidmap dbus-user-session
- mode: user
  script: |
    #!/bin/bash
    set -eux -o pipefail
    systemctl --user start dbus
    dockerd-rootless-setuptool.sh install
    docker context use rootless
probes:
- script: |
    #!/bin/bash
    set -eux -o pipefail
    if ! timeout 30s bash -c "until command -v docker >/dev/null 2>&1; do sleep 3; done"; then
      echo >&2 "docker is not installed yet"
      exit 1
    fi
    if ! timeout 30s bash -c "until pgrep rootlesskit; do sleep 3; done"; then
      echo >&2 "rootlesskit (used by rootless docker) is not running"
      exit 1
    fi
  hint: See "/var/log/cloud-init-output.log" in the guest
hostResolver:
  hosts:
    host.docker.internal: host.lima.internal
portForwards:
- guestSocket: "/run/user/{{.UID}}/docker.sock"
  hostSocket: "{{.Dir}}/sock/docker.sock"
message: |
  To run docker on the host (assumes docker-cli is installed):
  ------
  docker context create lima-{{.Name}} --docker "host=unix://{{.Dir}}/sock/docker.sock"
  docker context use lima-{{.Name}}
  docker run hello-world
  ------
Container config
Now create a Docker Compose manifest titled docker-compose.yaml:
version: "3"


services:
  valheim:
    image: ghcr.io/lloesche/valheim-server
    cap_add:
      - sys_nice
    volumes:
      - $HOME/valheim-server/config:/config
      - $HOME/valheim-server/data:/opt/valheim
      - /Users/$USER/.ssh/id_ecdsa_valheim:/root/.ssh/id_ecdsa:ro
      - /Users/$USER/.ssh/known_hosts:/root/.ssh/known_hosts
    ports:
      - "2456-2457:2456-2457/udp"
    env_file:
      - ./valheim.env
    restart: always
    stop_grace_period: 2m
And create a valheim.env file alongside it:
SERVER_NAME=ServerName
WORLD_NAME=WorldName
SERVER_PASS=securepassword
SERVER_PUBLIC=true
TZ='Europe/London'
POST_BACKUP_HOOK='timeout 300 cp @BACKUP_FILE@ $HOME/backups/$(basename @BACKUP_FILE@)'
Make sure to set the TZ variable to your time zone. Auto-restart and auto-update both rely on knowing the correct time, so they run in the small hours rather than mid-afternoon.
The POST_BACKUP_HOOK variable can be used to copy your world backups somewhere else after each local backup — either to your host machine via scp, or to a remote file server for extra redundancy.
If you'd like to copy backups back to your host machine, there's already a volume reference to /Users/$USER/.ssh/id_ecdsa_valheim in the compose file. To generate that key, run:
ssh-keygen -t ecdsa -f /Users/$USER/.ssh/id_ecdsa_valheim -N ''
Deploy your Valheim server container
Initialise your Lima VM with:
export LIMA_INSTANCE='valheim-server' &&
limactl start --name=$LIMA_INSTANCE $HOME/valheim-server/valheim-server.yaml
(You can add that export to your .zshrc as well, otherwise it resets on each new shell.)
Once the VM has finished initialising, enter it with:
lima
Now copy over your compose and env files:
mkdir -p ~/valheim-server &&
cd ~/valheim-server &&
cp /Users/$USER/valheim-configs/docker-compose.yaml . &&
cp /Users/$USER/valheim-configs/valheim.env . &&
docker compose up -d --remove-orphans
Starting the container will create two folders inside ~/valheim-server/: config/ and data/. These hold all your server and world data, so don't delete them.
Watch the logs with:
docker logs -f valheim-server-valheim-1
You'll see Waiting for server to listen on UDP port 2456 for the first couple of minutes. Once you see Server is now listening on UDP port 2456, the server is ready. There's one last step before it's reachable from the internet: forwarding your ports.
Access your server from the Internet
Forward ports
Once your Lima instance is running, a new IP will appear on your local network with a hostname like lima-valheim-server. Forward UDP ports 2456–2457 from that IP on your router. The exact steps vary by router, so check your documentation.
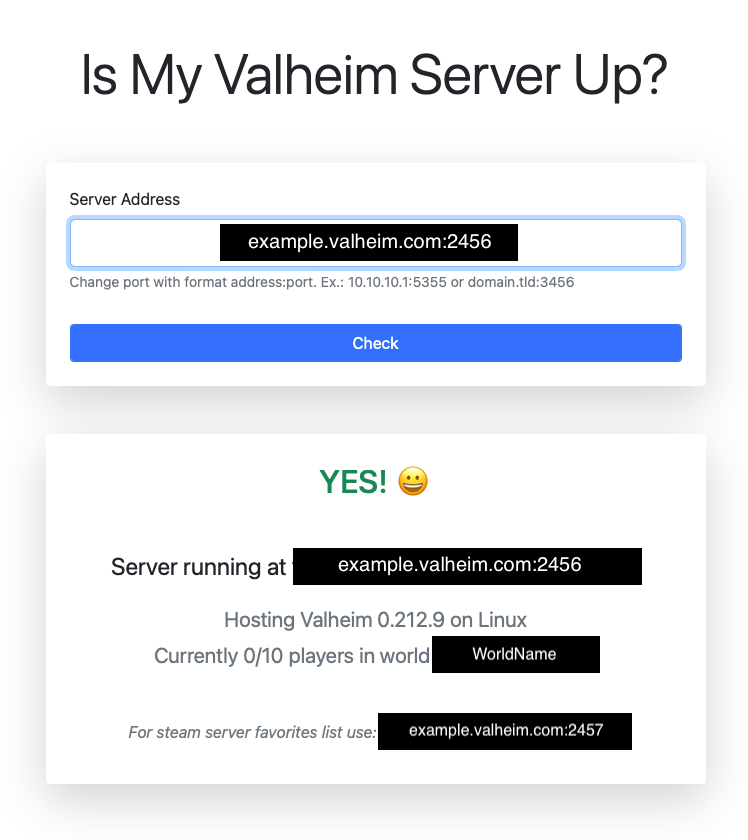
Check server status and logs
The easiest way to verify your ports are open and the server is working is to use https://geekstrom.de/valheim/check/ (your server needs to be set to public for this). Once you see a healthy status, you're good to go.
Join your server
After starting the game, select "Start Game," pick or create your character, then go to the "Join Game" tab and select "Add Server."
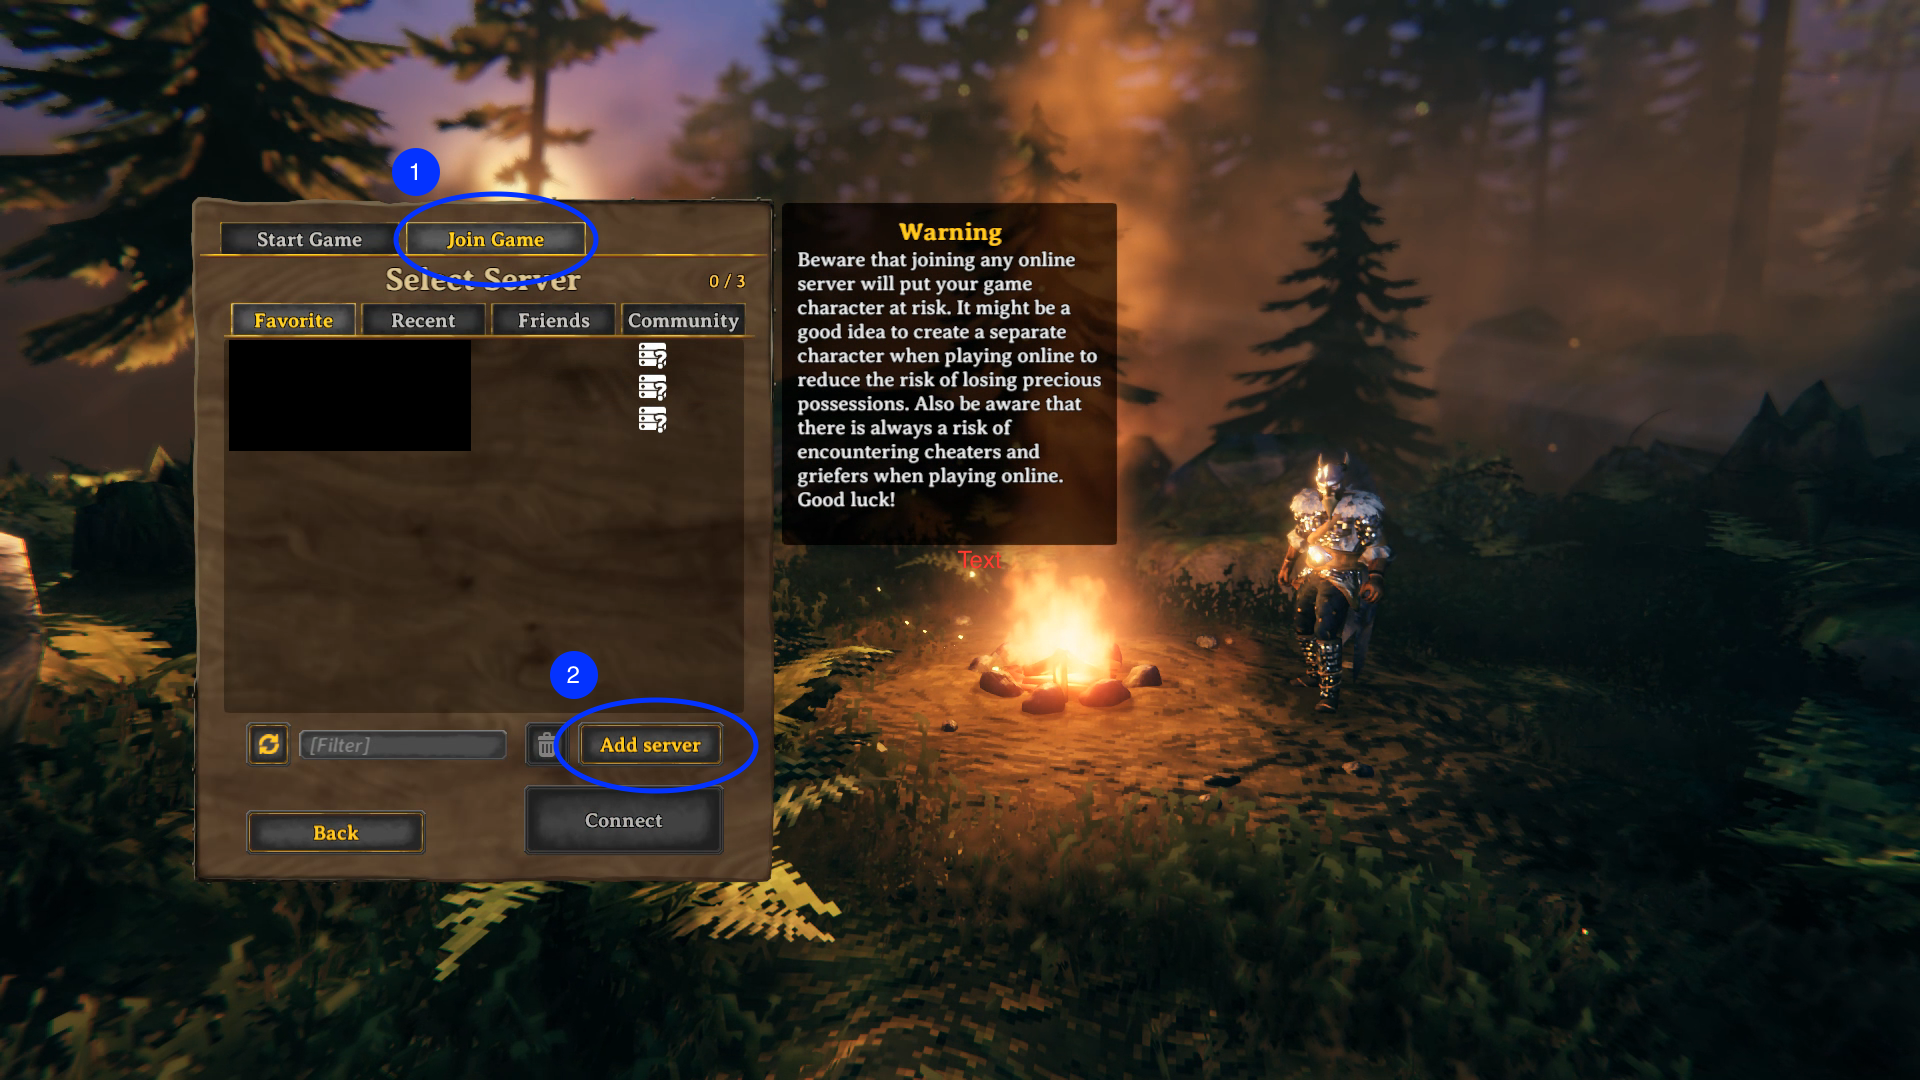
Enter your server name, press Return, then select "Connect."
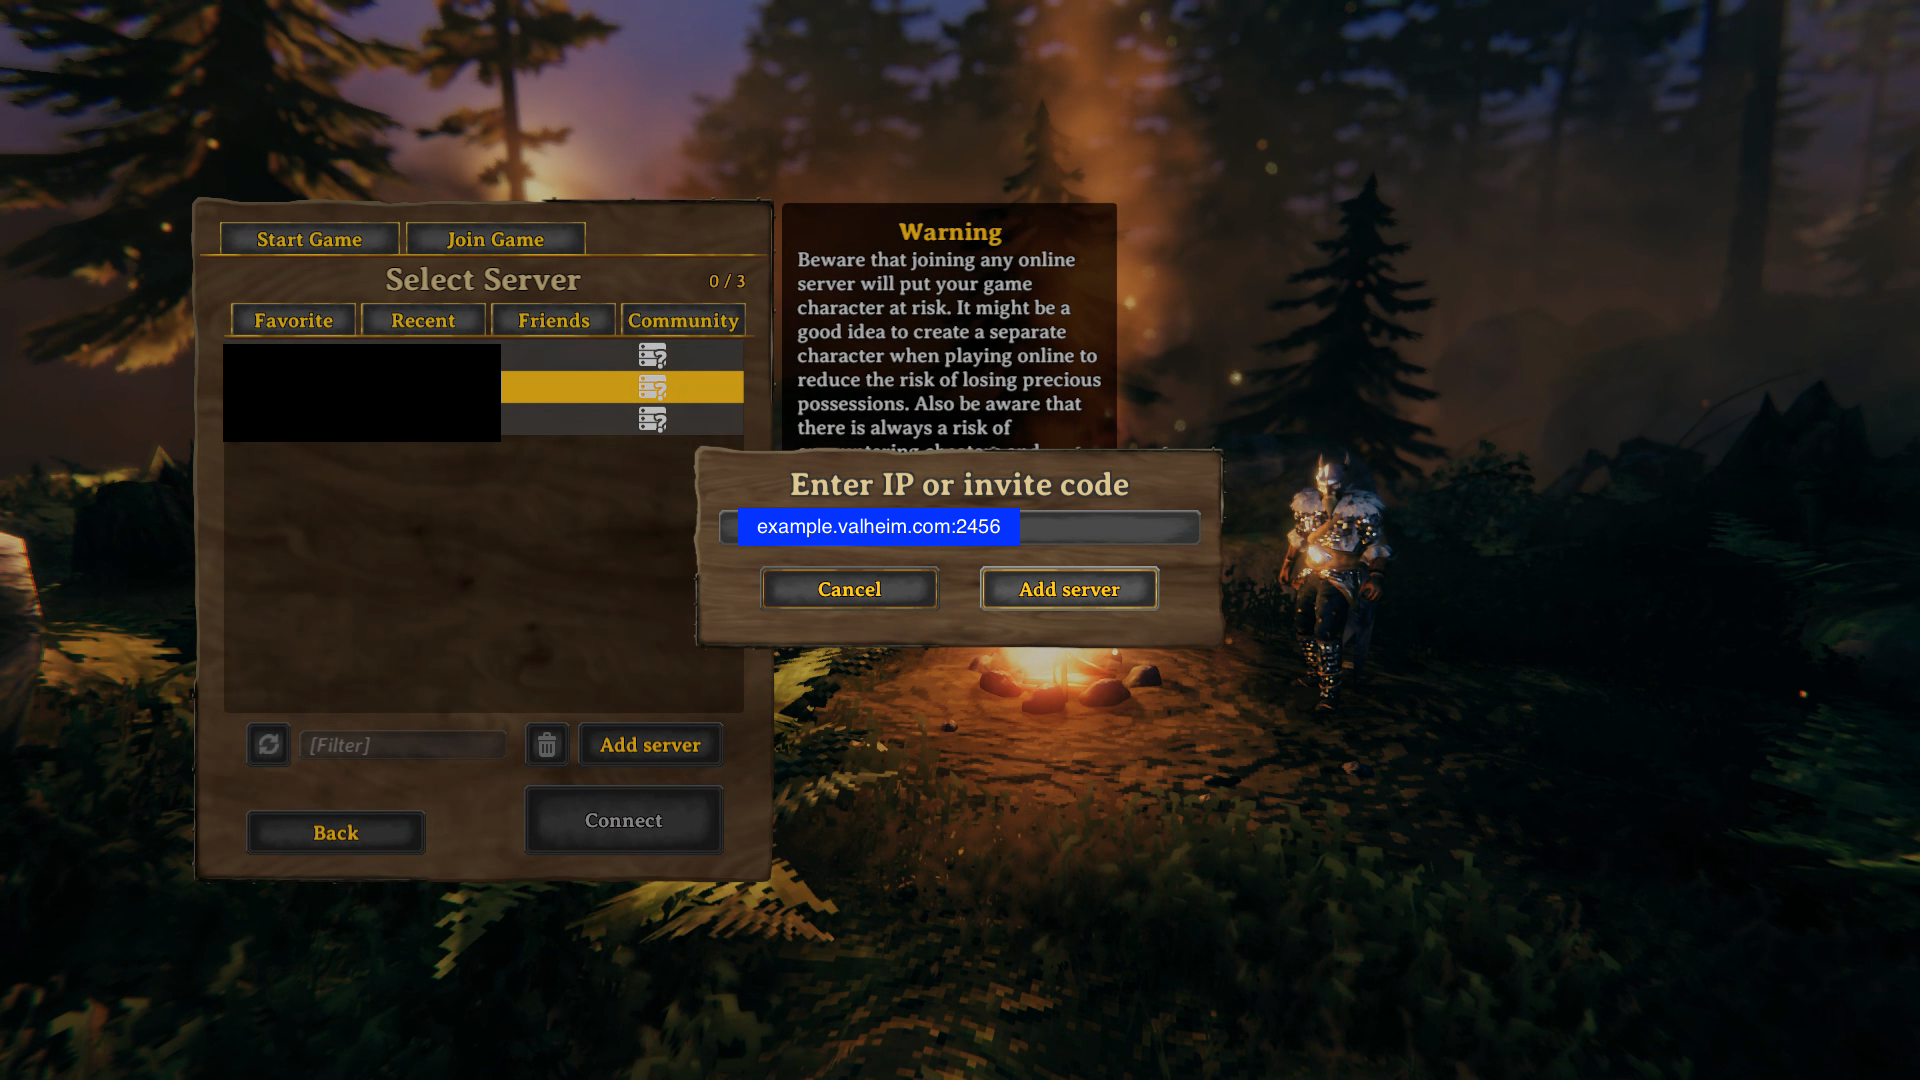
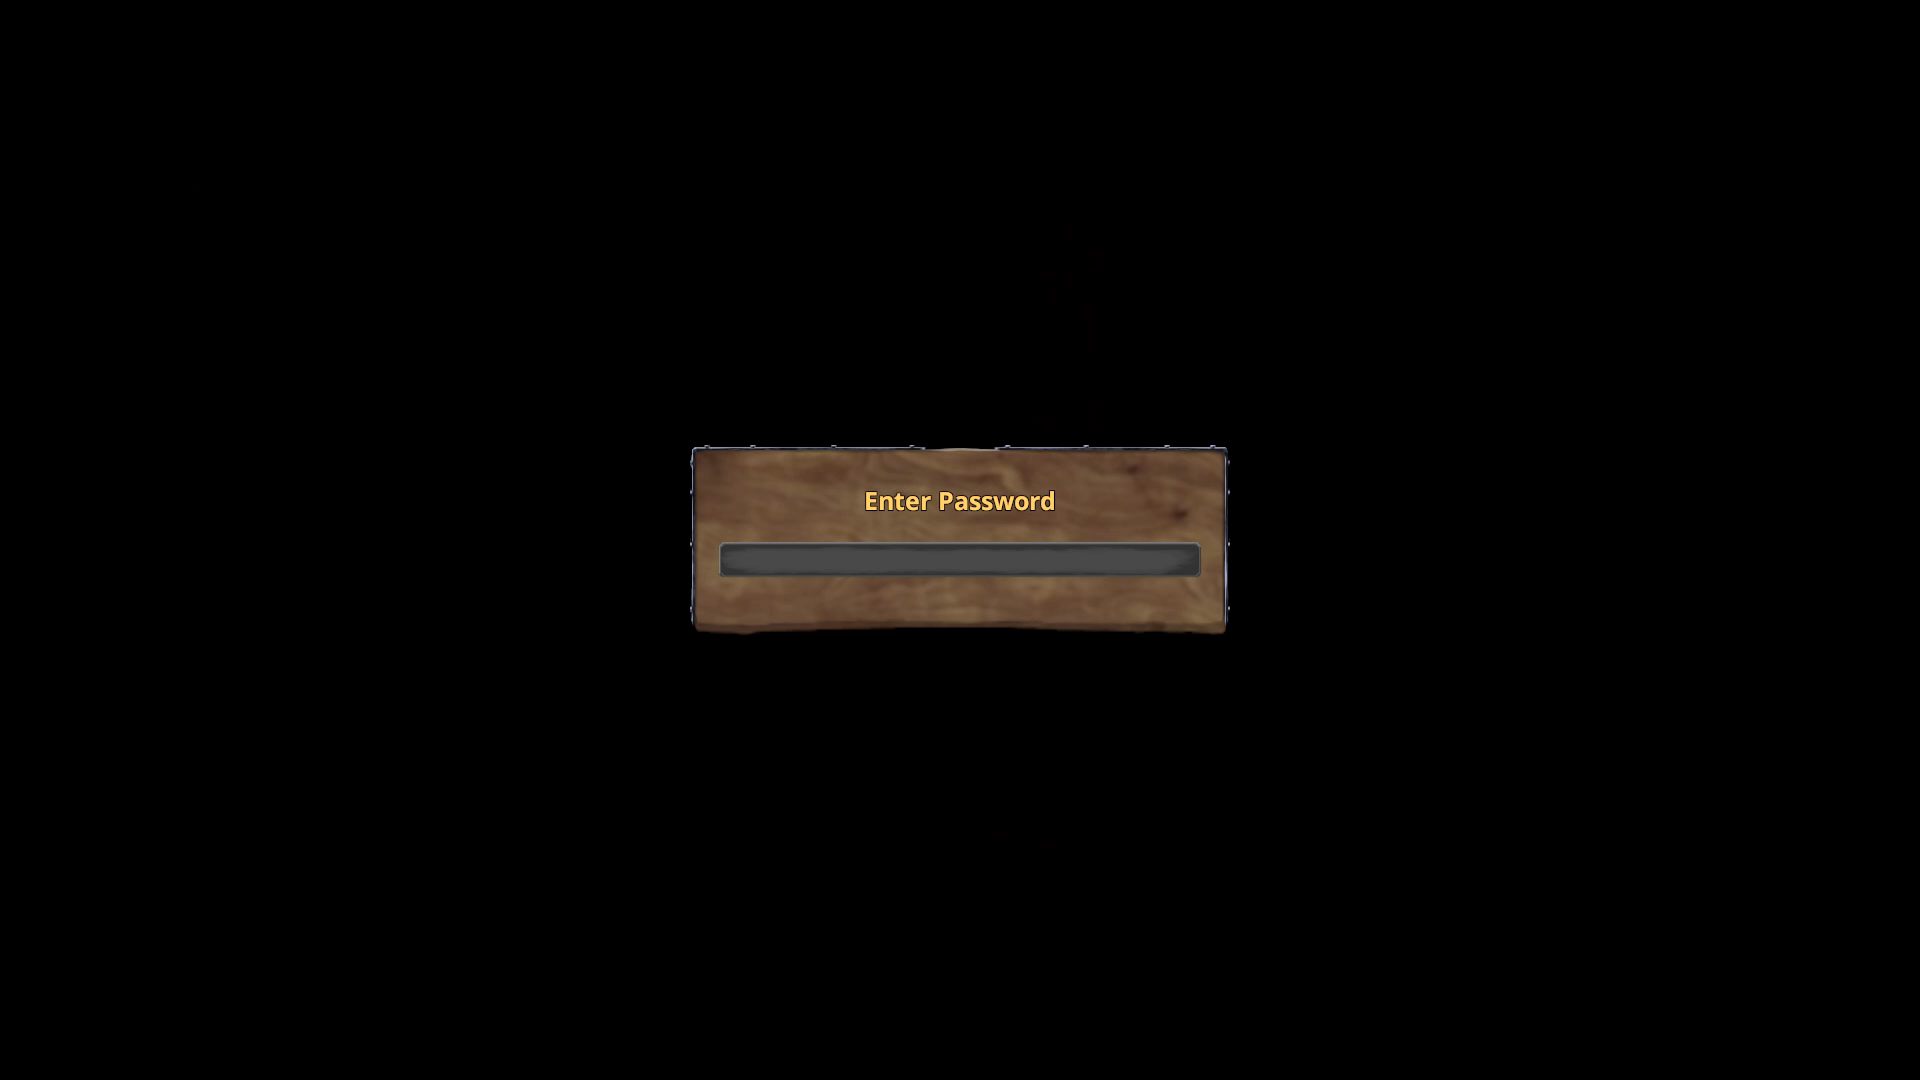
After a few seconds, you'll see an "Enter Password" prompt. Use the password you set in valheim.env.
Once your world loads, you're ready to go.

Conclusion
Apple Silicon turns out to be a surprisingly capable server platform — the level of sustained performance I've got from an 8GB M1 Mac mini, at that sort of power draw, is genuinely impressive. Hopefully this gets your server up and running so you can get on with building things and killing bosses.
Troubleshooting
Server says it's listening but it's still inaccessible
- Check that your ports are open on your router, and that you're forwarding from the guest IP (
lima-*.lan) rather than your host IP. - Stop the server, run
brew reinstall socket_vmnet, and start it again. The socket_vmnet service occasionally doesn't initialise cleanly. - Don't run socket_vmnet as a service on your host machine. The Homebrew install instructions suggest this, but Lima starts its own instance when launching the VM.
- Make sure you have at least 50GB of free space for your VM disk.
Container error mentioning incorrect architecture
- Make sure you've included
arch: x86_64in your Lima config. Without it, Lima defaults to fast (partial) emulation rather than the full emulation we need here.
Anything else
Open an issue on lloesche/valheim-server or lima-vm/lima as appropriate.